Modern Home Office Lighting Guide: The Three Layers That Actually Work
By Tereza Hower | Published May 7, 2026 | Updated May 14, 2026
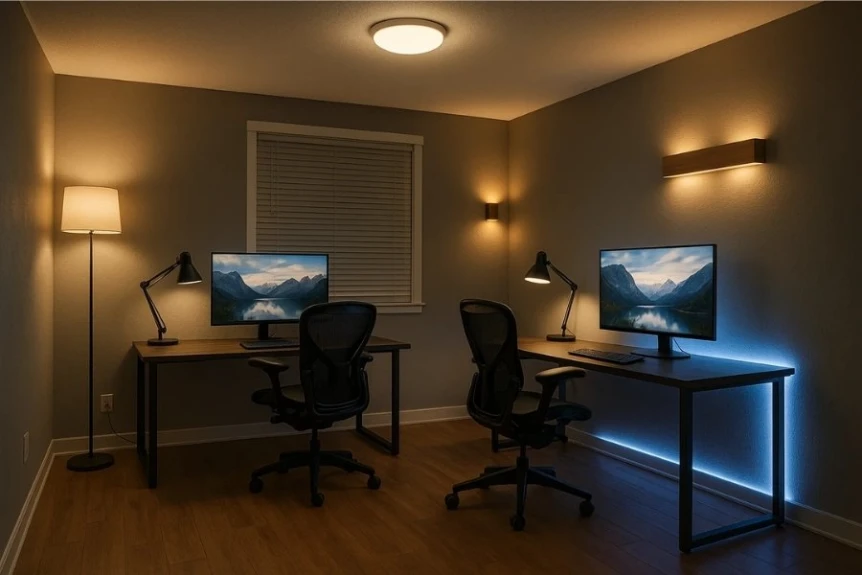
Walk into any well designed home office and the lighting is doing more work than you realize. Modern home office lighting is rarely a single fixture; the room reads correct because three sources are working together. One overhead, one task, one accent. Remove any of the three and the room starts to feel off, even if you cannot name what changed.
This guide breaks down the three layer principle in workspace context, the bulb temperatures that flatter both your face on camera and the rest of the room, and the specific fixtures that earn their place. The same logic applies regardless of style direction, though the fixtures themselves should match the room’s broader aesthetic.
Key Takeaways
- Light the room in three coordinated layers: ambient overhead, task at the desk, and a third source elsewhere to balance shadows.
- Stay in the 2700 to 3000 Kelvin range across every fixture; mixed color temperatures look wrong in ways most people cannot articulate.
- Choose bulbs rated CRI 90 or higher so wood, textiles, and your face on camera read accurately.
- Diffuse the bulb in every fixture: paper, fabric, opal glass, or perforated metal. Bare bulbs flatter nothing.
- Wire the overhead to a dimmer or use smart bulbs; a fixed-brightness overhead is the single largest missed lighting upgrade.
What Makes Modern Home Office Lighting Different?
Modern home office lighting is the coordinated set of light sources designed for daily focused work in a home setting: an ambient overhead, a task lamp on the desk, and an accent or ambient source elsewhere in the room. The word modern here is not a style claim; it describes how the room is conceived, as a residential space that also has to perform on a video call, not as a corporate work cell.
The third layer is the one people skip and the one I notice immediately when I walk into an office that feels off. Without it, the room divides into a bright desk zone and a dim everywhere else, which the eye reads as cramped and the camera reads as harsh. For the broader principles of layered lighting across rooms, the complete lighting guide covers the underlying logic.
The Three Layers, Side by Side
The table below is the quick reference for what each layer does, the fixture types that work for it, and the most common mistake associated with skipping or mis-specifying it.
| Layer | Job in the room | Fixture options | Sweet spot specs | Common mistake |
|---|---|---|---|---|
| Ambient overhead | General room illumination | Flush mount, semi flush mount, pendant, recessed cans | 2700 to 3000K, CRI 90+, dimmable, diffused shade | Bare bulb or 4000K cool white |
| Task at the desk | Light the work surface without glare | Articulating arm lamp, banker style, clip on, under shelf strip | Adjustable arm, warm bulb, shade conceals bulb at eye height | Glare onto the monitor or directly into your eyes |
| Accent or ambient elsewhere | Balance shadows, build atmosphere | Floor lamp behind chair, wall sconce, small table lamp on credenza | Any spot away from the desk, sculptural shade welcome | Skipping it entirely |
Layer One: Ambient Overhead
The overhead fixture handles general illumination. It is the light that turns on first when you walk in and the light that determines whether the room reads warm or clinical at first glance. The options depend on ceiling height and style direction.
Flush mount or semi flush mount
The right answer for ceilings under 9 feet. Look for a fixture with a fabric, paper, or opal glass shade that diffuses the bulb rather than exposing it directly. A bare bulb flush mount creates harsh shadows and reads industrial in the wrong way for most home office contexts.

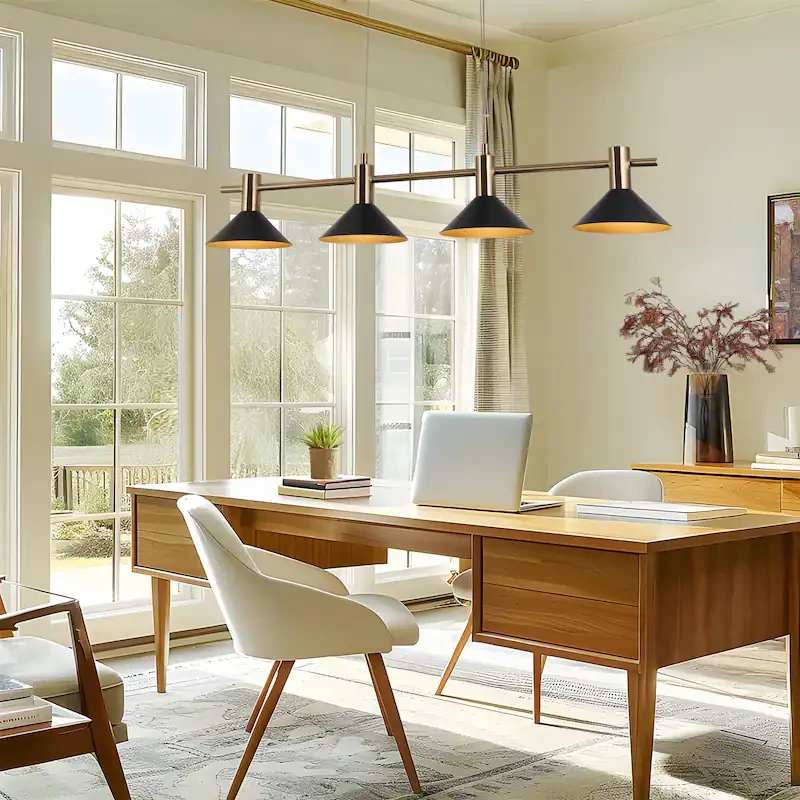
Pendant or chandelier
Works in rooms with 9 foot or taller ceilings, and gives you a chance to commit to a statement fixture. Position centered over the desk or slightly toward the door, depending on layout. A paper pendant for Japandi, a Sputnik for mid century, a factory style metal pendant for industrial, and a simple linen drum for Scandinavian all work.
Recessed lighting
The cleanest option for minimalist offices and the most flexible for any space. A row of two to four recessed cans on a dimmer gives you control over the intensity across the day, and the fixtures themselves disappear into the ceiling. The downside is the install cost if you are retrofitting an existing room without ceiling access.
Layer Two: Task Lighting at the Desk
Task lighting is the most important practical layer because it determines whether you can actually see what you are working on. The single source on the desk should be adjustable, warm, and positioned to put light on the work surface without throwing glare onto your monitor or directly into your eyes.
Articulating desk lamps
The most flexible option and the right answer for most home offices. The arm adjusts to direct light exactly where you need it, the shade hides the bulb to prevent eye strain, and the footprint stays small. Anglepoise, Artemide’s Tolomeo, and the Pixar style task lamps are all canonical for a reason. Choose the version in a color that suits the room: black for industrial, brass for mid century, white or sand for minimalist, natural wood and brass for Japandi.
Banker style and traditional desk lamps
Work in offices leaning more traditional or transitional. A green glass shade banker lamp reads classic and warm. The downside is the lack of adjustability. If your work shifts between writing, screen work, and the occasional video call, an articulating arm gives you more control.
Clip on or under shelf lighting
The right answer in small offices where surface space is limited. A small clip on lamp attached to a shelf or the edge of the desk frees the desktop entirely. Under shelf strip lighting mounted beneath floating shelves can also handle the task layer if you have shelving above the desk. The light should still be warm and directable.
Layer Three: Accent and Ambient
The third layer is what separates a workstation from a designed room. It can be almost any fixture as long as it lives away from the desk and contributes to the overall illumination of the room rather than the work surface.
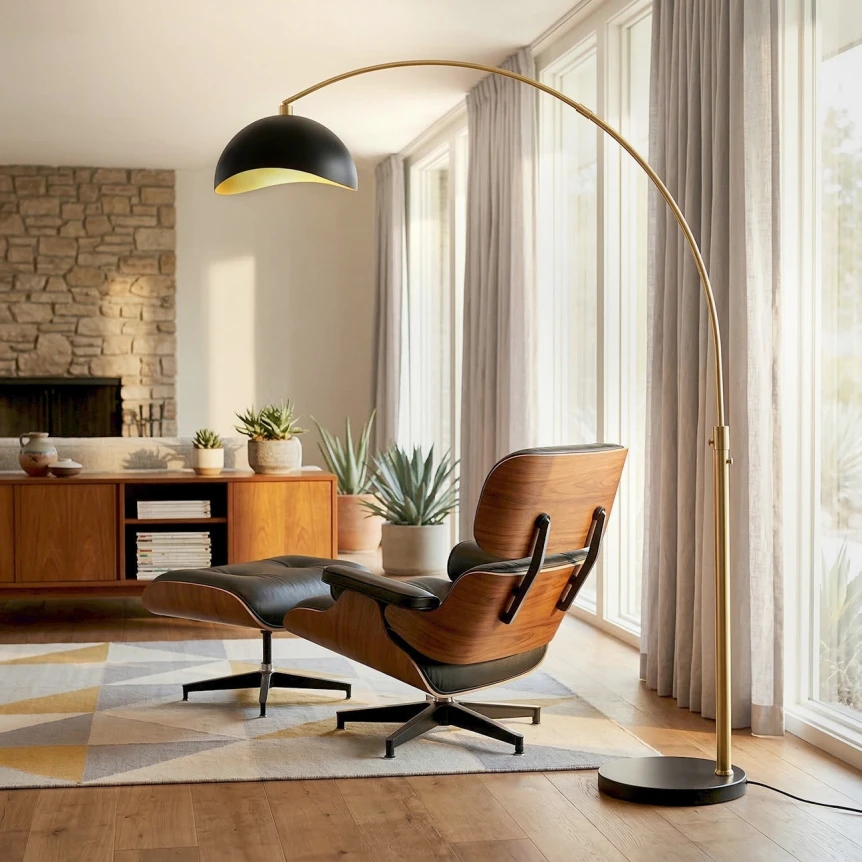
- A floor lamp behind the chair. Adds backlight that flatters the room on camera and gives you a reading light if you want to step away from the desk for a few minutes. An arc lamp reaches over the chair without taking up a separate surface.
- A wall sconce above a credenza or above a shelf. Architectural, uses no floor or surface space, and reads deliberate.
- A small table lamp on a credenza or a low shelf. The most flexible option because you can move it. Adds a pool of warm light that breaks the single source overhead.
The fixture itself can be sculptural and characterful. This is where the room’s personality often lives, and it is the easiest place to spend on something beautiful without compromising function. A ceramic table lamp, a paper floor lamp, or a brass sconce can each carry the third layer.
What Bulb Temperature Works Best?
Bulb temperature is measured in Kelvin. For a home office, the right range is 2700 to 3000 Kelvin. Below 2700, the light goes yellow and starts to feel like a hotel lobby. Above 3500, it reads cool and clinical, and your face on camera turns ashen by mid afternoon.
Three thousand Kelvin is the sweet spot for most workspaces. Warm enough to flatter both the room and your face on video calls, cool enough to support focused work without dragging energy. If you find yourself feeling drained in the afternoon, check the bulbs. A 4000K cool white bulb is one of the most common quiet causes of afternoon fatigue in home offices.
Match the temperature across all three layers. Mixing a 2700K table lamp with a 4000K overhead creates a visual conflict the eye cannot resolve. The room looks wrong and most people cannot articulate why.
Why Color Rendering Index Matters
Color Rendering Index, or CRI, measures how accurately a bulb shows colors compared to natural daylight. CRI is rated on a 100 point scale. Most cheap LED bulbs sit between 70 and 80, which is fine for hallways but reads flat and lifeless in a home office.
For a workspace, look for bulbs rated CRI 90 or higher. The colors of your wood furniture, the textiles in the room, and your face on camera will all read more accurately and more flattering. The cost difference is usually only a few dollars per bulb, and the visual improvement is immediately noticeable.
How Should You Light Yourself for Video Calls?
The home office is the room where lighting hits a second job: making you look like a functional human on camera. The same three layer principle that designs the room well also flatters your face, with two additional rules.
- Light should come from in front and slightly above, not from behind. A window behind you or an overhead directly above your head creates silhouette and shadow. A window in front of you, or a lamp positioned at the front edge of the desk, provides even key light.
- Soft light flatters. Direct light does not. A bare bulb, a clear glass shade, or a small intense fixture create harsh shadows on the face. Look for shades that diffuse the bulb: paper, fabric, opal glass, or perforated metal.
If you spend significant time on video calls and the room’s lighting is not flattering on camera, the cheapest fix is a small fill light positioned just behind your monitor at eye height. A simple table lamp with a warm bulb and a fabric shade will do most of the work that a dedicated video light does.
Should You Wire In a Dimmer?
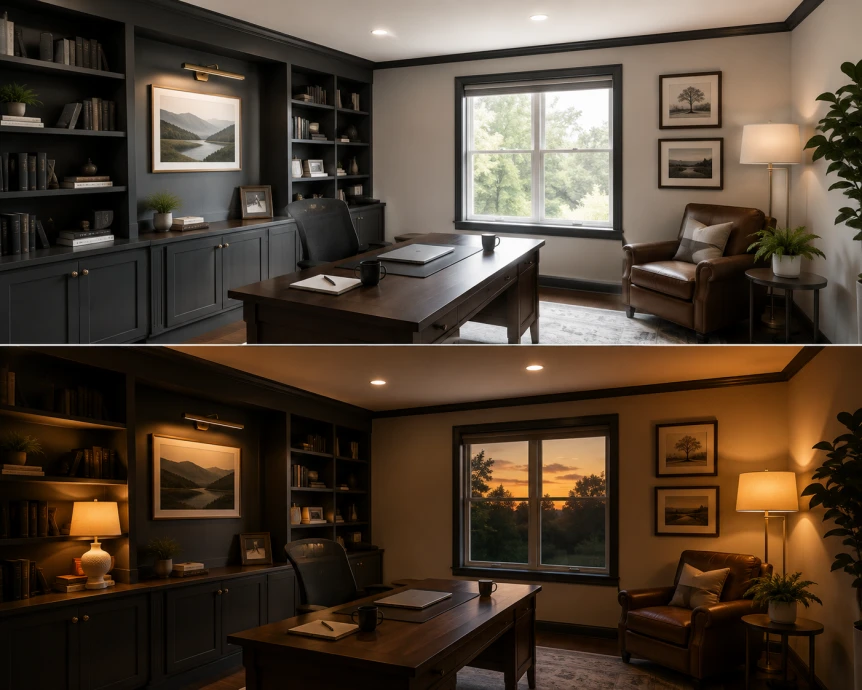
Dimmable overheads change the room more than people expect. A bright overhead at nine in the morning supports focused work. The same fixture dimmed to twenty percent in the late afternoon transforms the room into a calmer space for the end of the day or for a longer reading session.
If you can wire a dimmer into the overhead circuit, do it. If you cannot, choose smart bulbs that dim from an app or a wall switch replacement. Smart lighting in a home office is one of the few smart home upgrades that pays back daily.
Which Fixtures Suit Your Style Direction?
The three layer principle is universal. The fixtures should match the broader style direction of the room.
- Japandi. Paper pendants, washi shades, ceramic table lamps, and warm brass accents. See Japandi home office ideas.
- Minimalist. Recessed overhead, slim articulating desk lamp, hidden bulb in every fixture. See minimalist home office ideas.
- Scandinavian. Wall mounted sconces, linen drum pendants, slim brass or matte black task lamps. See Scandinavian home office for small spaces.
- Mid century modern. Brass Sputnik or globe pendant, brass articulating desk lamp, brass arc floor lamp. See the mid century modern lighting playbook and the mid century modern home office guide.
- Industrial. Factory style pendant, black articulating wall or desk lamp, exposed but considered fixtures with warm bulbs. See industrial lighting ideas applied in industrial home office ideas.
What Are the Most Common Home Office Lighting Mistakes?
- One overhead and nothing else. The most common mistake. The room will always feel off until you add a task lamp and a third source.
- Cool white bulbs. 4000K or higher reads clinical. Stay between 2700 and 3000.
- Mixing temperatures across fixtures. Pick one temperature and stick with it across every bulb in the room.
- Cheap bulbs with low CRI. Below 80 reads flat. Aim for 90 plus.
- Glare on the monitor. If a fixture is visible in the reflection of your screen, it is in the wrong place.
- Light from behind on video calls. Silhouette is unflattering. Move the light or move yourself.
- No dimmer. A fixed brightness overhead is a missed opportunity. Even a smart bulb retrofit is worth the small cost.
Putting the Lighting Plan Together
The order I would recommend: overhead first, task lamp second, third source last. Start with the overhead because it is the hardest to change once installed. Add the task lamp once the room is otherwise furnished and you know where the desk will live. Add the third source last because the right fixture depends on what else is in the room.
For the broader furniture context that the lighting plan complements, the modern home office furniture essentials guide covers the desk, chair, and storage decisions. For the broader pillar covering all aspects of the workspace, return to the complete guide to modern home office design.
Frequently Asked Questions
What bulb temperature is best for a home office?
Between 2700 and 3000 Kelvin. 3000K is the sweet spot for most workspaces, warm enough to flatter both the room and your face on video calls and cool enough to support focused work. Avoid anything above 3500K, which reads clinical and contributes to afternoon fatigue. Match the temperature across all three light sources to prevent visual conflict.
Do I really need three light sources in a home office?
Yes. Two sources are functional but leave the room looking flat. The third source breaks the single overhead shadow, balances the room visually, and gives the camera a more flattering ambient base on video calls. The third source does not have to be large or expensive. A small table lamp on a credenza or a wall sconce above a shelf is enough.
What is CRI and why does it matter for office lighting?
Color Rendering Index measures how accurately a bulb shows colors compared to natural daylight, rated on a 100 point scale. Cheap LED bulbs typically sit between 70 and 80, which reads flat. For a home office, look for bulbs rated CRI 90 or higher. The colors of your wood furniture, the textiles, and your face on camera all read more accurately. The cost difference is small and the visual improvement is immediate.
How do I look better on video calls without buying a ring light?
Position your main light source in front of you, not behind you, and slightly above eye level. A window in front, or a lamp positioned at the front edge of the desk, will do most of the work that a ring light does. Use warm bulbs with diffused shades to soften the light on your face. If the room still reads dim, add a small table lamp behind your monitor at roughly eye height as a fill light.
Are smart bulbs worth it for a home office?
Yes, if your overhead fixture is not on a dimmer. The ability to adjust brightness across the day is one of the few smart home upgrades that pays back daily. A bright overhead supports morning focus work, and dimming the same fixture in the late afternoon transforms the room into a calmer space. Choose smart bulbs with CRI 90 plus and a Kelvin range that includes 2700 to 3000.
Where to Read Next
For lighting across the rest of the home, the whole-house guide to choosing lighting room by room covers the underlying logic, and the modern bedroom lighting ideas guide applies the same three layer principle to a sleep space. For dining and living rooms specifically, see the dining room lighting guide and the modern living room lighting guide.