Outdoor Recovery Zones: Designing the Quiet Corner of Your Patio
By Tereza Hower | Published May 16, 2026 | Updated May 14, 2026
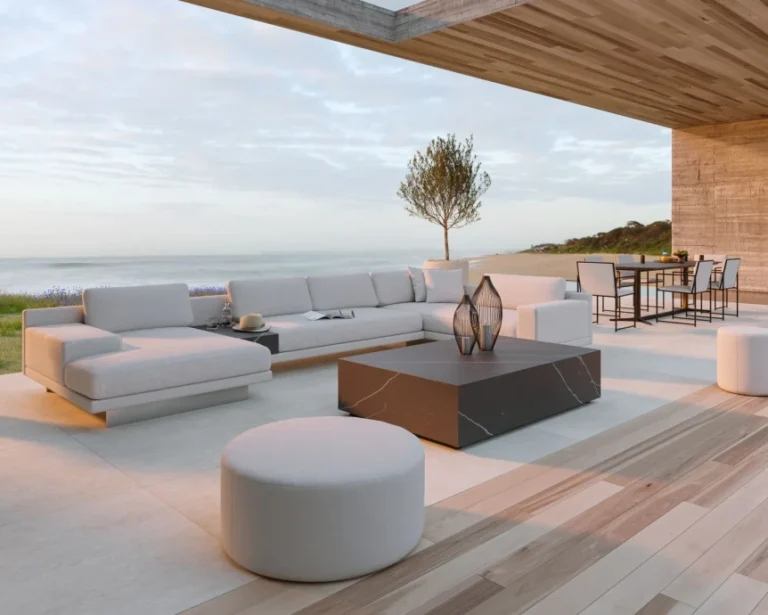
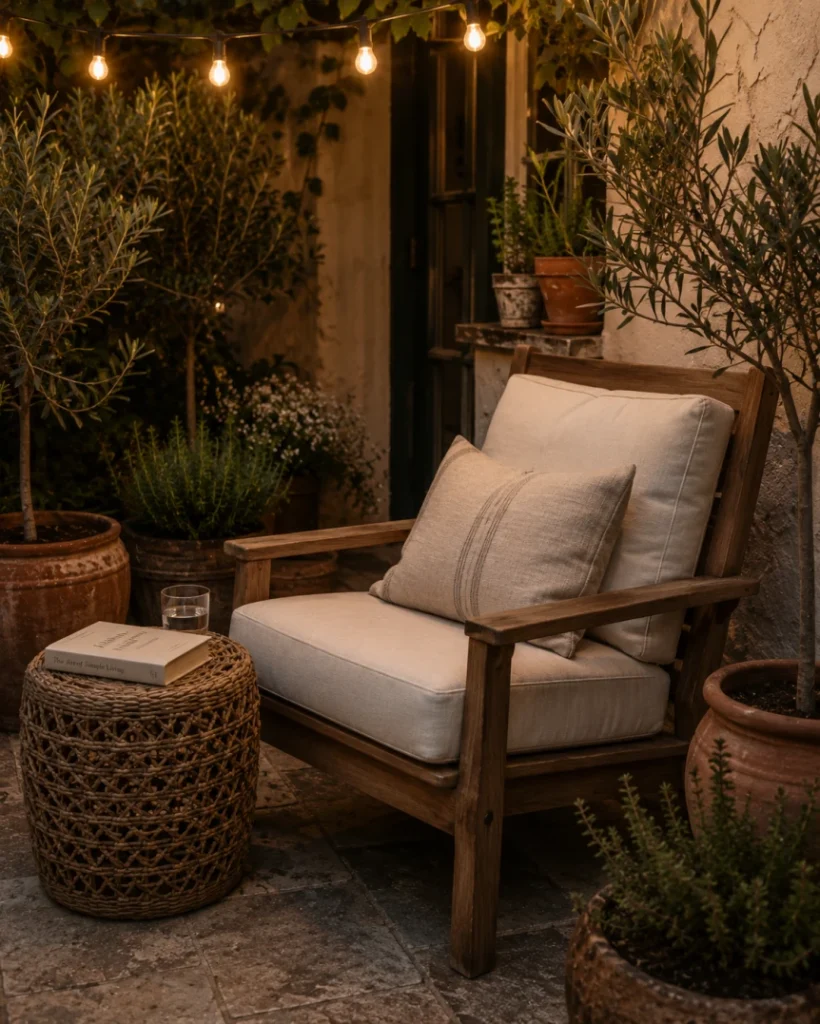
When I rebuilt our patio last spring, I designed the whole space around a bistro table. Two chairs, a small marble top, a planter at one end, string lights overhead. It worked. We ate dinner outside more often than we ever had before. But the piece of furniture that actually gets the most use turned out to be the lounge chair I almost added as an afterthought, tucked into the corner with a side table for a book and a glass of water. I sit in that chair alone five or six times a week. The dining setup gets used three. The math was a surprise, and it changed how I think about outdoor design.
The recovery zone is the fastest growing category in patio design and the most underbuilt corner of most outdoor spaces. People still design patios around entertaining and dining. The reality is that most of us, most evenings, want a quiet place to sit alone outside for twenty minutes. A space designed for that, deliberately and not by accident, gets used more than any other part of the garden.
What a Recovery Zone Actually Is
A recovery zone is a dedicated area of the patio or garden designed for rest, reading, napping, or daily wellness practices. It is physically and visually separate from the dining and entertaining zones, and its design supports being alone or with one other person rather than hosting a crowd.
The category covers a wide range. At one end, a single lounge chair with a side table and a few plants. At the other, an outdoor sauna and a cold plunge tub. What unites them is intent. The space is built for restoration rather than performance. For the broader outdoor design framework, the complete guide to outdoor and patio design covers how the recovery zone fits within the overall plan.
Why This Has Become a Trend Worth Naming
Two shifts have pushed recovery zones from niche to central. The first is the cultural emphasis on rest, sleep, and personal wellness practices that has reshaped how people use their homes. The second is the realization that the outdoor space, with its lower stimulation, natural light, and connection to weather and seasons, is often the most calming environment in a house. The combination makes the patio an obvious place to extend a wellness routine.
The honest test of whether a recovery zone is worth building is simple. If you currently spend any meaningful time on rest activities indoors (reading, napping, meditation, stretching, a quiet morning coffee), some portion of that could move outside in good weather and be better for it. A space designed to support that move pays for itself in actual use within weeks.
The Three Levels of Recovery Zone
Recovery zones scale across budgets and ambitions. Three levels are worth knowing, and each one delivers real value at its price point.
Level one: the lounge corner
One deep seat lounge chair, one small side table, one or two large potted plants, softer lighting than the rest of the patio. That is the entire setup. Cost runs anywhere from 400 to 1,500 dollars depending on the chair, and it can be assembled in an afternoon.
This is the version I recommend to anyone starting out. The investment is modest, the impact is immediate, and you learn whether you actually want to use the zone before scaling up. The chair is the only piece that really matters. Choose one with deep seating, a high back, and a cushion in solution dyed acrylic so it can live outside year round.
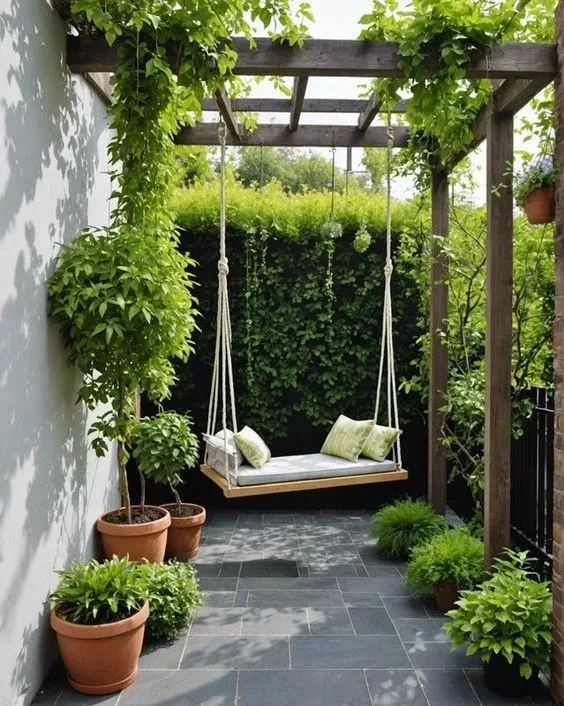
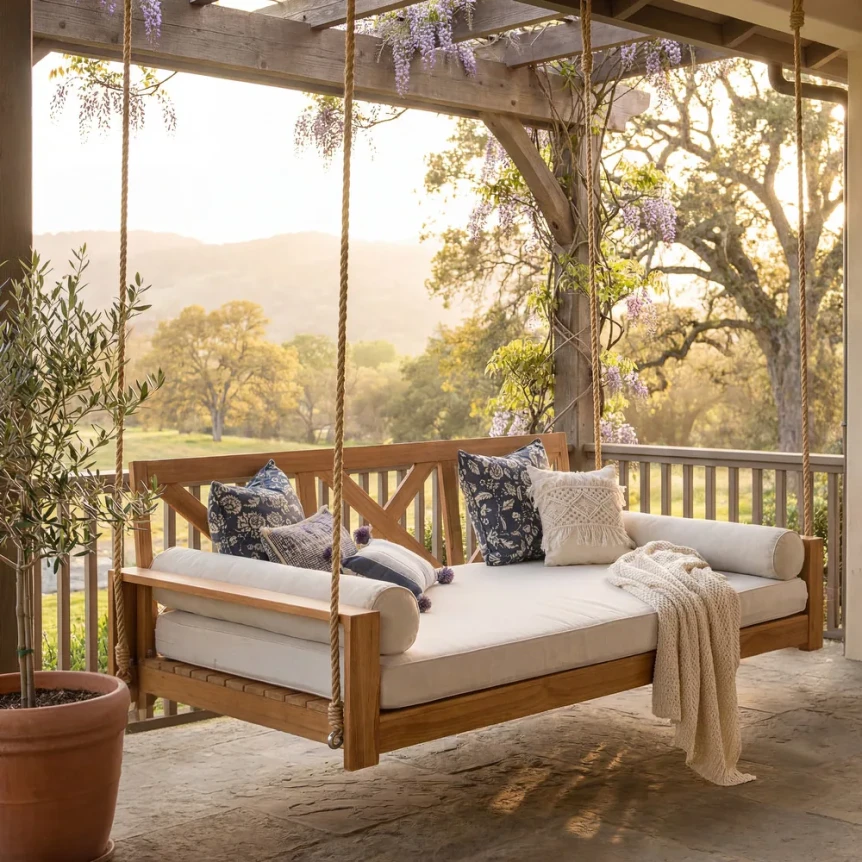
Level two: the lounge plus daybed or hammock
One step up adds a horizontal surface for full rest. A teak or aluminum daybed, a freestanding hammock on a wooden frame, or a hanging swing chair on a sturdy beam. The point is to enable napping or lying flat with a book, which the lounge chair alone does not really support.
Cost typically runs 800 to 3,000 dollars for the horizontal piece plus the cushions, and the footprint requires three to four feet of usable depth along one wall or corner. If you regularly nap or want to read for long sessions, the daybed earns its place quickly. If you mostly read for thirty minutes and move on, stay at level one.
Level three: the wellness installation
The most involved versions of the recovery zone are full wellness installations. Cedar barrel saunas. Cold plunge tubs. Small concrete or stainless steel plunge pools. Outdoor showers paired with sauna and plunge. These are real construction projects, with budgets that start at 5,000 dollars for a basic sauna and easily run into the high tens of thousands for a built in plunge pool with proper plumbing and electrical.
The honest filter for this level is frequency of use. A cedar sauna used four times a week is one of the best investments you can make in your home. The same sauna used four times a month is an expensive piece of yard sculpture. Be brutal with yourself about whether the wellness practice is already part of your weekly rhythm before committing. If it is not, build the level one or level two version, develop the habit, and consider scaling up only after a full year of consistent use.
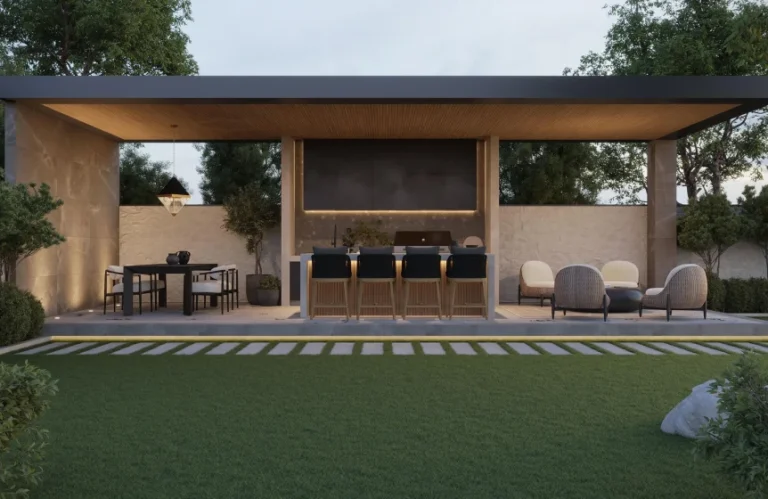
Where to Place the Recovery Zone
Placement is the single most important decision after furniture selection. A recovery zone in the wrong spot will not get used regardless of how well it is appointed.
- Choose a corner, not the center. Recovery zones need to feel tucked away. A chair placed in the middle of the patio reads as a seating option, not as a quiet retreat.
- Use a screening element. A tall planter with bamboo or grasses, a trellis with a climbing plant, or a slatted wood screen all create the visual separation that signals the zone is different from the rest of the space.
- Orient toward a view, not the house. Facing the garden, a fence with planting, or a single mature tree gives the eye something to settle on. Facing the back door of the house keeps you tethered to the indoor task list.
- Avoid the high traffic path. Place the zone away from the route between the kitchen and the dining area. Foot traffic past your reading chair makes it hard to settle in.
For small patios where carving out a separate corner feels impossible, the small patio ideas guide covers techniques for suggesting zones without dedicating full walls.
The Right Lounge Chair
The chair carries the entire recovery zone. Spend more here than you think you need to, because the chair is the difference between sitting outside for ten minutes and sitting outside for an hour.
What to look for: deep seat depth (at least 22 inches), a high back that supports the neck when leaned back, a cushion thick enough to read comfortably without rearranging yourself every ten minutes, and a frame engineered for permanent outdoor exposure. Teak and powder coated aluminum are the two reliable frame materials. Sunbrella, Outdura, and other solution dyed acrylics are the right cushion fabrics. Avoid anything with polyester cushion covers that absorb water and fade within a season.
What to skip: chairs marketed as outdoor that are essentially indoor furniture with weather resistant claims. Wicker pieces with no UV protected coating. Folding chairs of any kind. Anything where the back angle cannot be adjusted, unless the fixed angle is one you can actually sit in for an hour.
For the full breakdown of outdoor furniture choices including specific brand directions, see the best outdoor patio furniture guide.
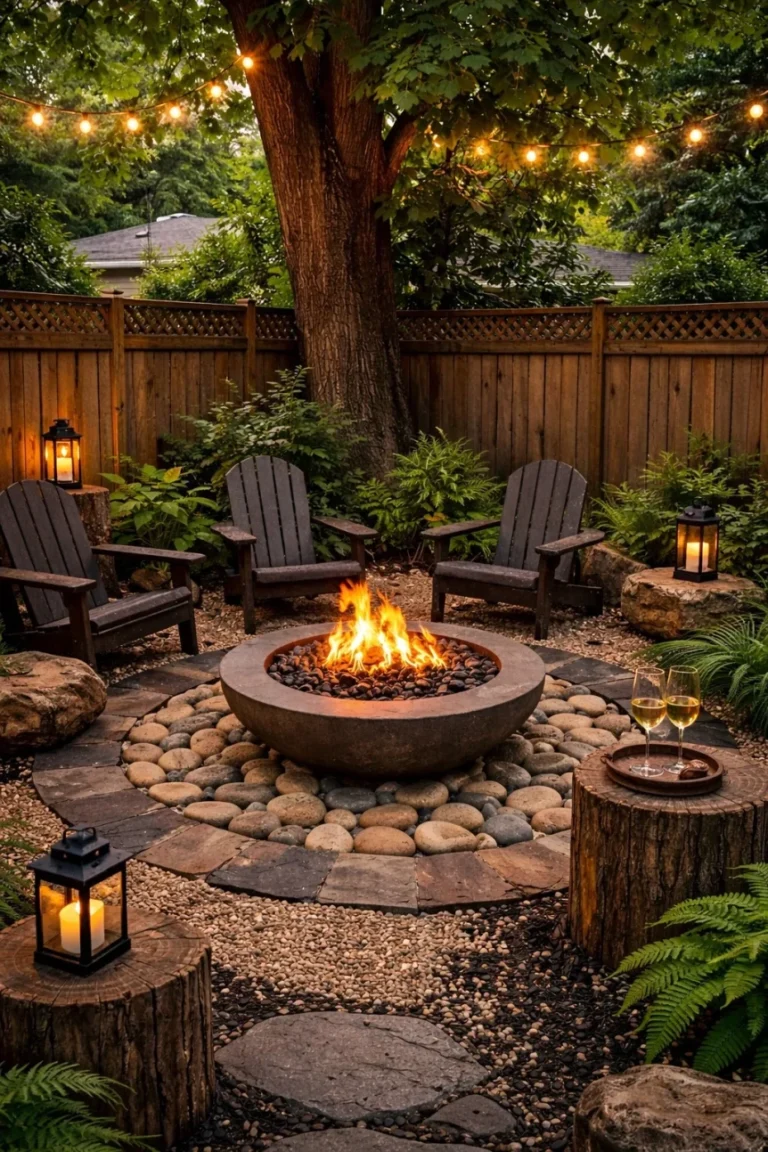
Lighting the Recovery Zone
The lighting of the recovery zone should be deliberately softer than the rest of the patio. Brighter light cues activity, alertness, and conversation. Softer light cues rest, reflection, and slowness. A recovery zone lit at the same intensity as the dining area will work against the purpose of the space.
What works: one small wall sconce or a single low table lamp with a warm bulb (2700 Kelvin or lower), candles or lanterns with real flames or quality flickering LEDs, a single string of warm white lights overhead at lower density than the dining string lights, and any uplight directed at a plant or a tree behind the chair rather than at the seating itself. The goal is to be able to read comfortably while keeping the surroundings dim.
For the full lighting layering principle that this builds on, the outdoor lighting ideas guide covers ambient, task, and accent layers for the whole patio.
Plants and Sensory Layers
Plants do more work in a recovery zone than anywhere else on the patio. They provide the screening that separates the corner from the rest of the space, they absorb sound, and they bring a sensory layer (fragrance, movement, the rustle of leaves) that makes the zone feel restorative rather than just quiet.
The plants worth knowing for this purpose: ornamental grasses for movement and sound, jasmine or honeysuckle on a trellis for fragrance in the evening, olive trees or fig trees in large pots for vertical anchor, lavender or rosemary near the seat for a scent you brush against, and bamboo (in pots only, never planted) for fast growing screening. One mature olive tree in a large glazed pot can carry an entire small recovery zone on its own.
The contrarian note here is that less is more. Three or four well chosen plants in generous pots read as deliberate. Twelve smaller plants in mismatched containers read as a garden center waiting room. The outdoor plants and landscaping guide covers planting selection in more detail.
For Outdoor Saunas Specifically
Outdoor saunas have moved from niche to mainstream over the last few years, and the entry point has dropped significantly. A basic cedar barrel sauna starts around 5,000 dollars including delivery. A more refined cube style sauna with proper insulation, a glass front, and quality finishes runs 10,000 to 25,000 dollars. Built in installations with custom carpentry can go considerably higher.
Practical considerations before committing: the sauna needs a flat, stable foundation (concrete pad or proper deck reinforcement), electrical access for an electric heater or a flue and ventilation for a wood burning unit, drainage near the structure for the cool down sequence, and a placement that gives you privacy from neighbors. The space around the sauna matters as much as the sauna itself. A chair to cool down on, a place to keep towels dry, and ideally a separate outdoor shower or plunge tub for the full sequence.
The single most common mistake with saunas is buying one larger than needed. A two person sauna takes the same hour to heat as a four person sauna but uses less energy and fits more locations. Unless you genuinely have a household of three or more who will use the sauna together, the smaller unit is the right call.
For Cold Plunges and Small Plunge Pools
Cold plunge tubs and small plunge pools are the other half of the wellness install. Cold plunges range from simple chest freezer conversions (around 600 dollars) up to professionally built fiberglass or stainless steel tubs with integrated chillers and filtration (10,000 to 30,000 dollars and up).
The professional units are vastly more pleasant to use, but the simple conversions are perfectly functional and let you test the habit before scaling up. If you have not done cold exposure regularly before, start with the cheaper option. Build the practice. Upgrade later if you find yourself using it three or more times a week.
Small plunge pools (under 12 feet long, depth 4 to 5 feet) are a separate category that bridges between swimming pool and cold plunge. They are cooler than swimming pools but warmer than plunge tubs, designed for a quick dip and a relaxed soak rather than laps or extreme cold. Installation is a real project (excavation, plumbing, electrical, permitting) and costs run 20,000 to 80,000 dollars or more. They suit homes where the recovery practice is established and the budget is genuinely available.
Common Mistakes in Recovery Zone Design
- Placing the chair in the center of the patio. The zone needs to feel tucked away, not exposed. Corner placement with a screening element behind or beside is essential.
- Overlighting the area. Bright light works against rest. Use softer, warmer, lower intensity lighting than anywhere else on the patio.
- Buying the cheaper lounge chair. The chair is the entire experience. Spend more here than seems reasonable, because you cannot make a mediocre chair feel restorative.
- Skipping the side table. Without a place to set a book, a drink, or a phone, the chair fights you every time you sit down. The side table is not optional.
- Overplanting. A recovery zone with too many small plants reads cluttered. Three or four well chosen larger plants beat twelve smaller ones every time.
- Buying a sauna before the habit is established. The infrastructure is significant. Develop the practice with cheaper tools first. Scale up after a year of consistent use, not before.
- Designing only for one person. A two seat recovery zone (lounge chair plus a smaller chair or stool) gets used by one person ninety percent of the time but accommodates a partner or a friend occasionally. The single chair zone forces a choice every time someone else wants to sit outside with you.
Putting It Together
The right starting point for most homes is the level one lounge corner. One deep seat chair in a tucked away spot, one side table, one or two generous planters, and softer lighting than the rest of the patio. Build it in a weekend, live with it for a month, and see what the actual use pattern reveals. If you find yourself reaching for it five or six times a week, scale up. Add a daybed for napping. Add a hammock for shoulder season afternoons. If the use pattern says daily wellness practice, look at saunas and plunges with real seriousness.
The point of designing the zone deliberately is that it stops being something you have to remember to use. When the chair is positioned correctly, lit softly, surrounded by plants, and within ten steps of the back door, you walk past it on the way somewhere else and find yourself sitting down. That is the whole goal.
For broader outdoor design context, return to the complete guide to outdoor and patio design. For specific applications, see small patio ideas, best outdoor patio furniture, and outdoor lighting ideas.
Frequently Asked Questions
How much space do I need for an outdoor recovery zone?
A level one lounge corner needs as little as 5 by 5 feet. A lounge chair, a small side table, and one or two large potted plants fit comfortably in that footprint. A level two zone with a daybed or hammock needs 7 by 8 feet minimum. Built in saunas and plunges need 8 by 8 feet at minimum plus clearance around them. If you have a 10 by 10 foot corner available, you can do almost any version.
What is the difference between a recovery zone and a regular seating area?
Intent and design choices. A regular seating area is built for conversation and social use, typically with multiple seats facing each other and brighter ambient lighting. A recovery zone is built for solo rest, with one or two seats positioned for a view, softer lighting, more screening from the rest of the space, and plants chosen for sensory effect rather than decoration. The same chair can work in either zone. The setup around it is what makes the difference.
Are outdoor saunas worth the cost?
For people who already have or want to build a regular sauna habit, yes. A cedar barrel sauna at 5,000 to 8,000 dollars used four times a week for ten years is one of the best per use values in any home upgrade category. For people who think they would use one occasionally, almost certainly not. The infrastructure is significant and the use pattern needs to be established first. Develop the habit at a gym or a commercial bathhouse for six months before committing to a home install.
Can a recovery zone work in a small patio?
Yes, and it may actually work better in a small space than a large one. A small patio that is already intimate only needs subtle separation to define the recovery zone. A trellis with a climbing plant, a tall planter beside the chair, or even just a deliberate change in orientation away from the rest of the seating can do the work. The level one setup is genuinely all you need.
What is the cheapest way to start a recovery zone?
A solid deep seat lounge chair (300 to 600 dollars), one small side table (100 to 200 dollars), one large potted plant in a generous pot (150 to 300 dollars for a mature olive or fig tree in a quality pot), and a small candle lantern. Total cost 600 to 1,200 dollars, assembled in an afternoon. The chair is the only piece worth overspending on. Everything else can be modest and the zone still works.
Where to Read Next
If you are still working out the broader plan for your outdoor space, the complete guide to outdoor and patio design is the place to start. For the furniture decisions that make or break the recovery zone, see best outdoor patio furniture. For the plants that screen and ground the corner, see outdoor plants and landscaping.